Remember those spheres that I made, from Brent’s pattern? I said that I would let you know how I deviated from the final construction. Well, here it is, my VD gift to you!
First, why I branched off from the original instructions…
I am anal retentive. I require perfect symmetry. It has taken years of therapy for me to get over sweater patterns with sloped shoulder having one shoulder slightly higher than the other. I am better now. (For the most part.)
Following the original directions will result in what looks like three full rows of stockinette on the sphere, where everywhere else, there is only one. These instructions may complicate matters (par for the course for me!) but it does result in what amounts to a single full row of stockinette, and thus perfect symmetry.
I followed Brent’s instruction as written up until the very last row of knitting. I did not knit that last row. This means that I still had wrapped stitches from short rows still on the needles. I should also mention that I used a pair of needles from a set of dpns. This is important, because it allowed me to access the stitches in a row from either side.
So, after doing my last row of knitting, as mentioned above:
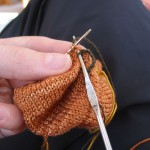
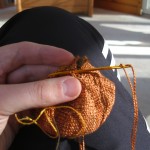
1. I did a crocheted slip stitch (which amounts to a chain stitch) through each stitch on the needle starting from the side that still has wrapped stitches. In other words, that first stitch that I would have knit for the next row is the last stitch I slip stitch off of the needle.
I do this to get the knitting off of the needle. It makes the whole project easier to work with for me, especially when the styrofoam ball has to go in the center. The reason why I am specific about the order in which you are slip stitching the knitting off of the needle is because the last stitch slip stitched off the needle will be the first stitch grafted; and the crochet will be taken out as the stitches are sewn.
Now, do you crochet through the wrapped yarn or not on the stitches that are still wrapped? That is up to you. For these photos, I crocheted to include the wrap yarn. On the first two balls that I did, I did not crochet through the wrap yarn. After doing it both ways, my preference is not to crochet through the wrap yarn. Whichever way you choose to do it, just be consistent. It is less to keep track of you do something the same way through an entire project.
This is what it looks like once all of the stitches are slip stitched off of the needle.
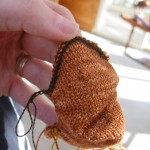
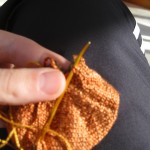
2. Now it is time to thread the needle and round up all of the slipped knit stitches that form the bottom of the sphere. (These are the knit stitches that were slipped at the start of each row of knitting.) I put the needle up through the center of each of those slipped knit stitches, starting at the cast on row…
… and pulled the yarn tight to draw them together, closing the bottom of the sphere. (BTW, this is part of Brent’s instructions.)
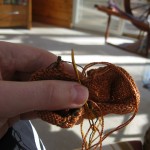
3. It is now time to do the grafting. From the last step, the needle is already up through the center of the last stitch of the last knitted row. Now, I bring the needle across the top of first stitch of the cast on edge, rather than the bottom of the first stitch of the cast on edge.
The reason for this? The grafting is going to replace that first row of stitches. So, rather than joining the first row of stitches to the last knitted row, I am joining the second row of stitches to the last row that I knitted.
After bringing the needle through the top of the first cast on stitch (or the bottom of the second row of stitches, if you prefer,) I pick out the cast on stitch, since the sewing is replacing that row. (Sorry, the picture that I have for this part was so blurry it was unusable.)
4. I go through the stitches in the last row that I knitted. This is a basic part of grafting that you should be familiar with.
I undo the crochet as the stitches get secured by the sewing.
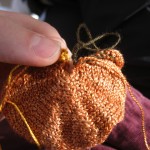
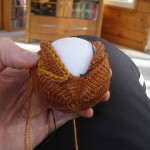
5. I repeat steps 3 and 4. After doing it for about five or six stitches, I insert the ball.
This actually makes my life a little easier, because it is easier for me to work with something that is rigid than floppy. (Please, no comments on that line.)
Once past the halfway point on the ball, the wrapped stitches will have to be dealt with. Whether your crocheting included the wrap around the stitch or not, I make sure that needle comes up through the center of the stitch, over the wrap in the back of the work, and under the wrap in the front of the work. Basically, I am duplicating the yarn path that would be followed if I had actually knit those wrapped stitches. (I know this kind of sounds like, “And the magic happens here!” but if you are familiar with short rows, then you do know the yarn’s path.)
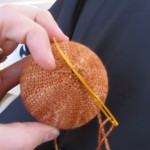
6. Now, I just round up the slip knit stitches at the top of the ball, the same as I did on the bottom.
Sometimes, I go one and a half times around, so that the two loose ends of yarn end up opposite each other. This helps with balance when the sphere hangs from these loose ends.
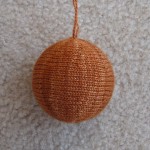
And now the sphere is complete!
Copyright 2009 by G. P. Donohue for textillian.com
Comments
4 responses to “Shiny Disco Balls”
Happy Birthday!!! Thank you for such a thorough tutorial on these cute Christmas ornaments. I think they’re a great way to use up sock yarn. I appreciate your attention to detail. Where do you get the styrofoam balls? These will make great Christmas present decorations.
Well, those are lovely, though the title of the post combined with it being V’day, I guess I was thinking outside the box, so to speak…
Is it your b’day?
Wow, congrats on solving this problem. I must admit that I had had thoughts in this direction myself, but I thought: since a knitted sphere will always be an approximation, those extra two rows of stockinette won’t make a difference. Bravo for taking the trouble to make that final perfect finishing touch!
Now, if you could just figure out for me how to kitchener stitch in 3 colours (i.e. intarsia stripes), that’d be grand…
happy belated birthday! thanks for the great tutorial. i can see you put a lot of work into it.